How to Convert Large Disk to GPT Step-By-Step?
Nowadays, large disk becomes more and more affordable and popular. However, it is possible that you find your disk not showing its full capacity in Windows Explorer. For example, a 4TB hard disk drive only shows 2TB.
Why is large disk not showing its full capacity?
If a large hard drive (whose capacity is beyond 2TB) is initialized to MBR partition style, it won’t show its real capacity. This is because MRB supports up to 2TB disk and the reset space isn’t usable. And the space beyond 2TB will present as a form of unallocated space in Disk Management. You can’t create new partition with the unallocated space or add it to one partition. Therefore, when large disk has been originally initialized to MBR, it’s very necessary to convert the disk to GPT to make full use of disk space.
Note: If your Windows is running Windows XP (32bit), don’t change the partition style into GPT for your hard drives. Otherwise, the drive can be inaccessible and is labeled as GPT Protective Partition.
Convert large disk to GPT with different utilities
After planning to convert your hard drive to GPT from MBR, have a close eye at how to complete MBR to GPT conversion. If the MBR disk has been allocated (with partition and data), it’s recommended to apply a reliable & powerful third-party disk converter, AOMEI Partition Assistant Standard. The software allows you to convert GPT to MBR without deleting any existing partition in Windows.
If the MBR disk doesn’t contains any partition and data and you don’t want to turn to third-party software, you can make conversion via Diskpart or Disk Management.
1. Convert disk to GPT via AOMEI Partition Assistant
Step 1. Free download the software from its official website. Install and run it.
Step 2. On its home interface, right-click the large MBR disk and choose “Convert to GPT Disk”.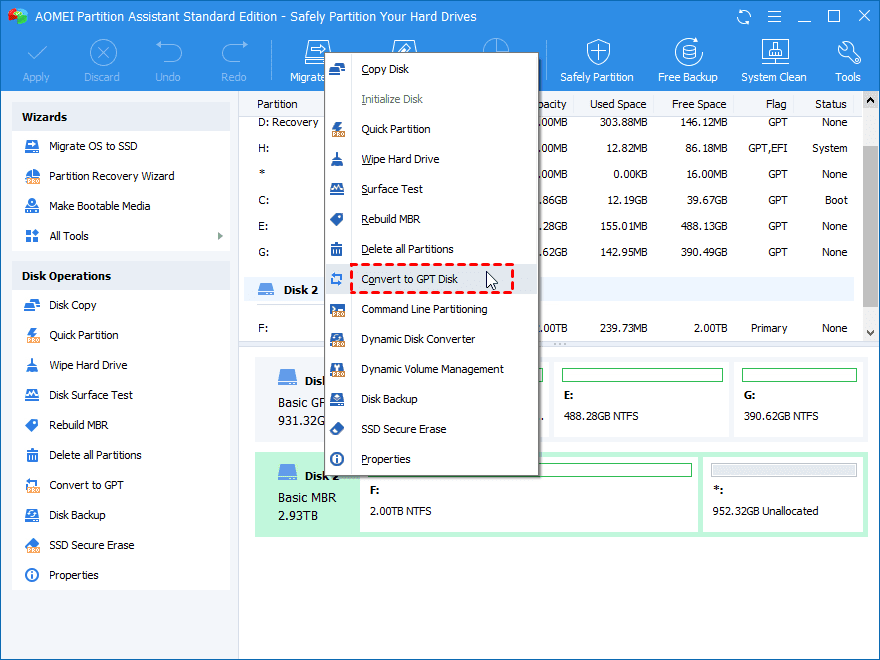
Step 3. Click “OK” button to confirm that you want to convert this disk to GPT. 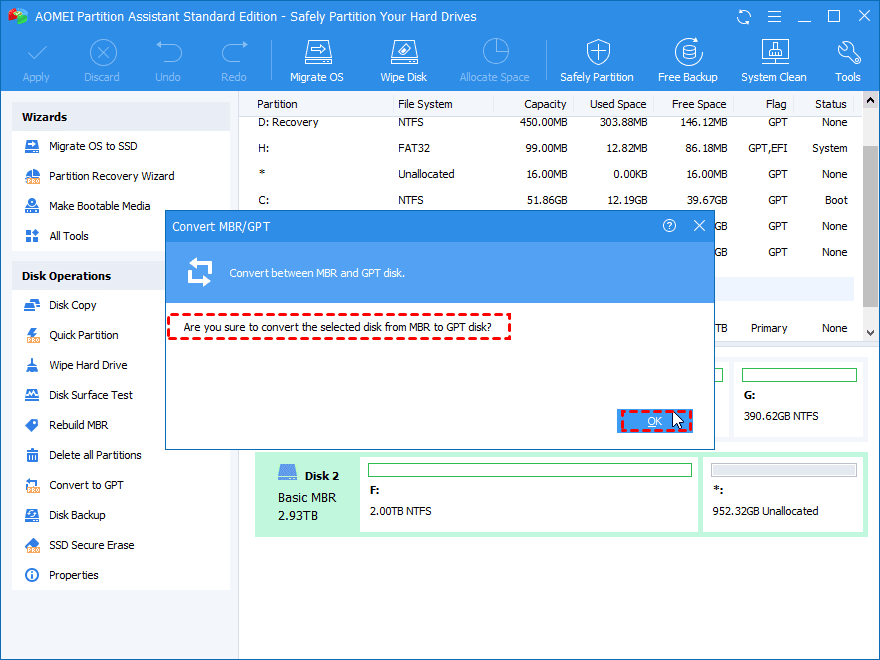
Step 4. Here you can preview that the MBR disk will be converted to GPT
PS.: To convert system disk to GPT without losing data, you can employ its Professional version.
2. Convert disk to GPT via Disk Management
Step 1. Press “Windows” + “R” simultaneously to open “Run” dialogue.
Step 2. In the box, input “diskmgtmt.msc” and press “Enter” key to access Disk Management.
Step 3. Locate the large MBR hard drive, right-click it and choose “Convert to GPT Disk”.
Step 4. After a while, you’ll find that the disk has been converted to GPT successfully.
Note: When the disk contains partition (s), you’ll find that Convert to GPT Disk greyed out. In such condition, you can use the first way to convert disk or delete all partitions on the MBR disk at first. [All data saved on the disk will be erased after you delete all partitions]
3. Convert disk to GPT via Diskpart
Step 1. Open “Run” dialogue, input “diskpart” and hit “Enter” to open Diskpart utility.
Step 2. Run commands listed below:
- list disk
- select disk
- convert gpt
If the MBR disk holds partition and data, you can run commands as follows:
- list disk
- Select disk
- clean
- convert disk
PS.: “clean” command will get rid of all data on the MBR disk.
After you convert your larger MBR disk to GPT successfully, you can extend partition with the unallocated space with create new partition on it.
Facebook Comments